
Every once in a while, it’s time to step back, take a look and really consider new technology. But for guitar playing, tube loving, tone snobbering purists, it’s hard to do, right? Could you ever conceive of replacing your Holy Grail tube amplifier with a digital re-creation?
OK, maybe not replacing, but what if you could clone the tones from your impressive collection of boutique amps and store them in one main “library” box where you can then recall any amp, anytime, anywhere for stage or studio application? Oh— and you can also manipulate those amp profiles to make and create new profiles, including sounds with a wide array of popular guitar effects. We can think of a ton of benefits, not to mention saving wear and tear on our treasured gear and really lightening the load and cubic footprint in size… but only if the sound and the feel came close enough to the real thing.
| Category | Value | Rating |
| Features | 20% | |
| Usability | 25% | |
| Sound | 25% | |
| Documentation & Support | 10% | |
| Price | 20% | |
|
|
||
| OVERALL RATING = 3.7, which earns it a WIHO Award!
3.6 stars or better: Outstanding, WIHO Award |
||
We’ve been kind of lukewarm when it comes to amp modeling. It sounds decent, but for many of us, it just isn’t “there” yet. However, the Kemper Profiling Amplifier, which takes a very different path towards tone nirvana than amp modeling, seems to have given us what we’ve craved from modeling amps: genuinely great tone with real amp feel. This could very well be just the right technology for your B rig, and for some of you, the days of carting around heavy tube amps might just be coming to a close.
Features
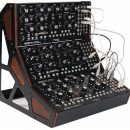
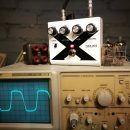
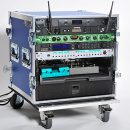
The main purpose of the Kemper Profiling Amplifier (KPA) is to capture and clone the tonal characteristics (sounds) of any amplifier and have it available as a preset for use anywhere, at any time. For review purposes, Kemper provided us with the space-age lunchbox looking, non-amplified, Kemper Profiling Amplifier Head. Kemper also offers the same unit in a 19” rack configuration, and both rack or head version can come configured with an internal power amp if desired, too.
Let’s start off talking about why profiling is so different from amp modeling. With amp modeling, programmers analyze the circuitry of specific amplifiers and digitally re-create them. A better, or more accurate, programming job can play a big part in determining why one company’s modeled Marshall Plexi sounds more authentic than the next. But amp profiling is more like sampler-meets-convolution-reverb-processor. In the case of the KPA, test tones are output by the KPA, played through your amplifier, and then impulse responses are recorded into the KPA, analyzed, and then reassembled as a virtual model of your specific amp sound.
Unlike modeling, each profile offers a unique snapshot of your amp, so if you’ve got a four-channel amp like the ENGL Powerball II or a Mesa Boogie Road King II, at a minimum, you’d need to create four profiles to take all of your sounds on the go.
Have no fear, though… the technology in the KPA enables you to have plenty of control over gain, EQ, and more, after the profile has been captured, so you have far more than simply four specific tones (using our example). With this basic profiling introduction out of the way, let’s take a look at all of the details:
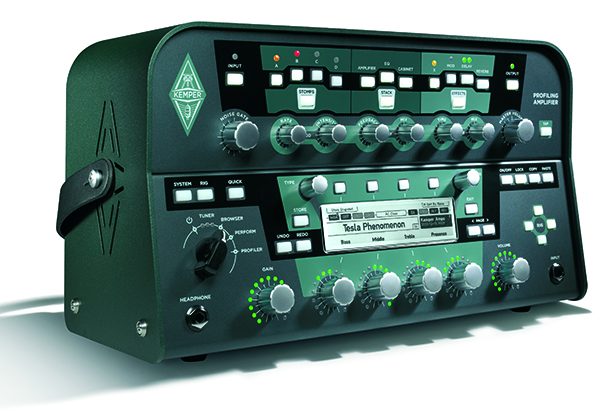
 The Kemper Profiling Amplifier is housed in a rugged aluminum case accompanied by a mini guitar-style strap as a carrying handle. The function controls are of soft pushbutton style, providing on/off indication and navigation through specific menus, along with a set of barrel style knobs for direct access to standard tone shaping controls and on-the-fly sound tweaking.
The main control switch, easily identified by its chicken foot knob, is located on the lower left front face of the Kemper. The mode selections of the knob include Off, Tuner, Browser, Perform and Profiler.
The front of the KPA provides two ¼-inch input jacks, one for your guitar, and one for a set of stereo headphones.
There are three main tone-shaping “blocks” provided on the front of the KPA which define your overall sound:
Stomps – effects providing Distortion, Wah, Chorus, Phaser & Flanger, Compressor, EQ, Delay, and external Effect Loop insert point
Stacks – provides the raw virtual guitar amplifier: Amplifier, EQ, and Cabinet (or stacking there of.)
Effects – fixed position Delay, Reverb, X & Mod modules. Think of this as your rack effects, post amp, vs. the Stomps module that appears in the signal chain before your amp.
Direct control knobs provide immediate control over the Noise Gate, Mod (Rate & Intensity,) Delay (Feedback & Mix,) Reverb (Time & Mix,) and Master Volume.
An LCD Screen shows amp profiles, program settings, and editing options.
The six control knobs at the bottom face of the Kemper are multi-functional, but when in a particular Rig profile, they provide immediate access to control your amp settings: Gain, Bass, Mid, Treble, Presence, and Volume. No digging through menus to tweak your amp, unlike some popular and pricey modeling amps.

The rear of the Kemper Profiling Amplifier provides three analog output sections: Master Output section containing both XLR and ¼ inch, left/right (stereo) connections; Monitor Output section containing one ¼ inch output; and one Direct Output / Send containing one ¼ inch output. All output sections contain a ground lift switch.
Additional connections include an alternate ¼ inch TRS input, effect return input (also both XLR and ¼ inch TRS), digital S/PDIF In/Out, MIDI In/Out/Thru (5-pin DIN), Switch/Pedal 1 & 2 TRS input, and a USB connection.
The Kemper uses a standard IEC power cable.
The dimensions of the Kemper Profiling Head are Height 8.54 inches, Width 14.88 inches, and Depth 6.81 inches. With a total weight of 11.73 lbs, it’s super easy to cart around in a gig bag.
Usability
If you’re considered “Old School” these days, you’ll probably think that at first glance, the Kemper Profiling Amplifier looks like a piece of modern medical equipment – very clean and high-tech with its boxy format and loads of buttons and control knobs. All that’s missing is the IV. Scary! Not to worry, there’s no MD required, and once you take a look at the details and sectional layout of the unit, it will all fall in place and make total sense to the point of finding the Kemper to be highly intuitive from an operating standpoint.
Cutting right to the chase, the Kemper Profiling Amp is far easier to use than most comparable sounding modeling products. It’s clearly designed with musicians in mind.
From a plug-and-play perspective, we had no problem figuring out how to plug in our guitar and a set of headphones for a test drive of some of the preloaded rigs provided in the library. Format and navigation pretty much fall in line with other related rack gear. And, the LCD provides excellent on-screen directions to assist you when programming, editing, and profiling.
There was no doubt in our minds that that large chicken foot knob on the lower left face of the KPA was the ignition key for this wicked machine. The five function selections are easily seen and identified: OFF, TUNER, BROWSER, PERFORM and PROFILER. And, since this wasn’t a powered head, we didn’t need to worry about attaching a speaker cabinet to carry the impedance load.
About the time it takes for a tube amp to warm up before switching off standby, you’ll be waiting the same amount of time for the Kemper to boot up.
We found the tuner to be very effective and visually exceptional. As with most tuners, our string/note was automatically detected. On the selection dial itself, the tuner provides three LEDs. When a string is in tune, the center LED will shine bright with the two adjoining LEDs dim. To indicate sharp and flat, the brightness of the LEDs shifted, far left being flat and far right being sharp (useful for a glance from across a stage). Additionally, on the LCD screen, the string/note was listed along with a visual representation of a virtual bubble-leveling tool in which a centered bubble indicated “in tune,” with far left being flat and far right being sharp. We also appreciated the mute button for silent tuning and the ability to calibrate away from A440 if necessary.
Navigation through the library of Rigs (think guitar tone presets) was easy after we turned the knob to the Browser setting. We easily scrolled through the library menu by turning the Browse knob located at the top right of the LCD screen. The second navigation method, using the RIG control buttons on the far right, provided a “next in line” profile selection method using four directional buttons for navigating the list of presets.
We liked the instant response of using the RIG selection method for running through the library as it automatically loaded the selected Rig Profile. When using the Browse control knob, once we selected the desired profile, we then needed to press the Load button in order for the Profile to be enabled. In a live venue, though, we like this method better, though, as we can dial up sounds silently without engaging them
Between the large, easy to read, LCD screen and the program menu options, we found the Kemper to be very well laid out and easy to operate. Once in a selected Rig profile, all information and edit options are clearly noted on the screen. You can’t miss the large bold lettering of the actual Rig Name. And to make editing easier, options are listed next to their corresponding soft button for entering menu pages and making changes. There’s no “hold xxx while pressing xxx” and hoping you get to the desired outcome. In fact, while some other high-end amp modelers require diving into menus and “programming” your sounds, operation of the KPA always feels more like making adjustments on a musical device, no studio engineering credentials required.
We found the menu listing of options to cover every possible scenario. Kemper really found a way to please everyone. Options include:
• How you want to view Rigs: By All Rigs, Favorites, Non-Favorites, My Rigs, and Current Author.
• Sorted By: Name, Author, Date, Amp/Cab, Gain.
Next in line on the screen are selected options from the Stomps, Stacks and Effects soft buttons at the top section of the Kemper. This easily notes what has been engaged in the signal path: pre-amp effects (Wah, Chorus, Phaser/Flanger, Compressor, EQ, Delay, and Effects Loop), Amp/Cab selections, and post-amp effects (Delay, Reverb and Modulation). We found the menu options listed in each section provided tons of options to help customize our specific Rig. Although there’s not always a lot of talk about the inclusive effects, the KPA can really function as your one-stop rig shop, no extras necessary. If desired, though, you can place additional pedals in the chain between your guitar and the Kemper input, or make use of the effects loop connection for post-preamp effects.
Despite the space age look, there was no mistaking where the controls were to tweak Gain, Bass, Middle, Treble, Presence and Volume settings. The main control knobs complete the bottom of the Kemper just like you would find on any standard head. We specifically liked the easy quick access and illuminated LEDs outlining each knob to display the actual incremental setting. The functional name of each knob is clearly displayed in the LCD screen above for the Bass, Middle, Treble and Presence controls. However, the far left Gain control and far right Volume control are labeled in black stencil over the light grey background – an excellent contrast, but this could be a challenge to see on a dark stage.
Having the ability to copy and paste different Rigs and Stomp, Stack, Effects programs is an added benefit when wanting to take parts of your favorite sounds and apply them to other amp profiles. And you also have the ability to lock profiles to eliminate any accidental changes.
Lets move on to the Perform selection of our main control knob. In short, this section of the KPA allows the user to identify/select all profiles that will be used in performance mode (think building a gig set list). This makes it a lot easier to scroll through a narrower listing of desired profiles as opposed to the entire library. And as with the main library, you have the option to arrange the Perform library listing in your preferred order. And, as with most programmable devices, we had no challenges connecting our favorite MIDI foot controllers from Voodoo Lab and RJM Music Technology and using those to directly select various rig profiles, and for manually controlling essential functions like Tap Tempo, Volume, Wah parameter changes, and turning effect blocks on/off.
Now, onto the whole reason one may consider a KPA as the primary amplifier in their arsenal of heads… Profiling. We all agree that many heads are better than one. And what better way to have all your heads in one place, to be accessed anywhere, at any time, and switch between Rigs within the amount of time it takes to make a program change? The intensity was killing us, so off we went… and as it turned out, setting up the KPA to profile another amp couldn’t be any easier! It only took a three-step process after setup.
First, we wanted to ditch the headphones and get some live sound, so we connected the KPA to our JBL PRX715 powered speaker system via the Monitor Out connection on the back of the KPA. Entering the Profile mode on the Kemper was as simple as turning the main control chicken foot knob to Profiler. Next, we connected the Direct Output from the Kemper to the Input of our Bogner Ecstasy head. Then, we connected a Shure SM-57 microphone to the Return XLR jack on the rear of the Kemper and placed the mic in front of our Bogner Ecstasy 4x12 cabinet. Setup 99% complete.
Performing the actual profiling was a simple three-step process, and the LCD screen on the KPA provided step-by-step instructions. Step 1, we set our amp to the desired tone we wanted to capture. Next, we set the reference amp volume and toggled back and forth (using the soft buttons noted on the screen) between the Kemper amp and the Reference amp sound to help us position the mic exactly where we wanted it in order to profile (capture) the best-desired sound.
In Step 2, we selected the type of tone we were planning to capture, with Clean or Distorted choices to select from on the display. Step 3: Hit the Start Profiling soft button. It was that simple, and we were greeting by the lovely sounds of test tones (impulse responses) howling through our guitar amp. Be aware that the impulse responses being sent to your reference amp will be as loud as your amp’s set volume.
During the third step we had the option to Refine the actual profile, in case we felt the KPA didn’t capture our amp’s response exactly to our liking. Arriving at the final step, we found it easy to name and save our new profile.
In the preceding test scenario, we used the microphone option for getting the sound from our reference amp to the Kemper. You also have the option to use the direct out from your amp head (if it has one) going direct to the KPA via a ¼-inch cable.
We found the optional output connections on the rear of the KPA covered all configurations and applications we desired. The optional Main Direct Outputs are optimal for sending your amp signal to a front-of-house mixer or recording console. It provides both XLR and ¼-inch connections in stereo or mono. Independent Ground Lift switches for all outputs on the KPA is a nice detail, though we didn’t experience any ground issues in our setup.
Other connections include Pedal/Switch 1 & 2 for assignable pedal functions, a USB port, and S/PDIF connections. Pedal/Switch 1 & 2 are equipped to accept momentary switches, and regular expression pedals and can be assigned to the function of your choice – a great advantage when customizing your own setup without the need for additional effects processors and such.
We covered many of the great advantages relating to the functionality of the Kemper Profiling Amplifier, but what about application? In our review of the unit and its capabilities, the KPA provided an excellent solution for cloning our favorite, most prized amplifiers, and keeping those sounds archived in one central library. No matter where the music takes you, whether in the studio or live performance, local or abroad, being able to have your library of amps and tones on hand anywhere at anytime is priceless. With a box compact enough and light weight enough to fit in your carry-on baggage, it’s a globe trotting session player’s dream.
By the time you read this review, you may have heard Kemper’s 2015 Winter NAMM-related news: Kemper just released the Profiler Remote, a beautiful MIDI foot controller purpose-built to be paired with the KPA.

Sound
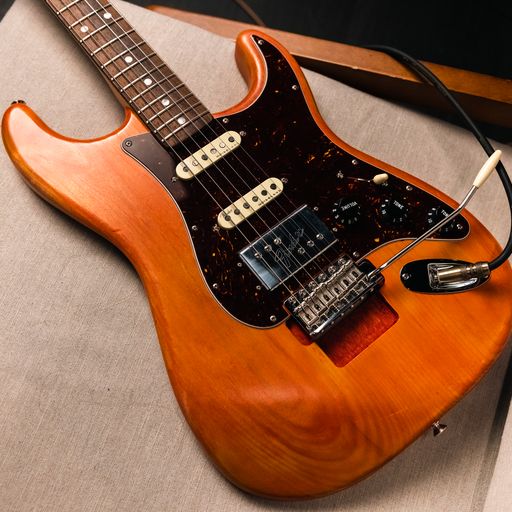
The moment of truth… We talked all about the ease of navigating the Kemper Profiling Amplifier and the many benefits to using a profiling amp, but what about the sound quality? What about the actual profile of another amplifier? Admittedly, we were all skeptics—NAMM Show demos can’t always be taken as the “truth,” so we started out easy by profiling a clean, well-rounded sound of a Fender Twin using a Fender Strat guitar. Pretty straight forward setup, but definitely has a tone of its own, with a distinct clarity, shimmer and brightness. To our surprise, the Kemper captured every nuance of the amp. Of course the sound changes depending on mic placement, but when comparing the reference amp sound to the actual profile, which you can do with direct A/B switching, the result was nothing short of amazing.
This intrigued further interest, so we wanted to test the Kemper with slightly overdriven tones as well as heavy distortion. For that, we turned to our Bogner Ecstasy. To say it simply, we were amazed at the quality of our profiled sounds from both the Blue and Red Overdrive Channels.
One of the biggest issues we have experienced with amp modeling in the past is that there is always that lost something in the model, whether it’s the actual saturation of the tubes, the warmth, or the overall playing response/sag. The Kemper Profiling Amplifier manages to capture those small nuances to such a degree that playing our profiles truly feels like we are playing through the actual amps. We didn’t have to try and squeeze the feel and tone from our fingers—it was present and as accurate as the real amplifier. Amp response varies from one amp to another, and it’s such a huge part of why models often times feel like a disappointment. Kemper’s approach to amp profiling really preserves the response, and even lets you custom tweak it to make sure your profile feels as good as it sounds.
We didn’t want to quit playing through a speaker cabinet, but we needed to check out the recording aspect of the Kemper Profiling Amplifier, so we went direct from the Kemper into our ProTools rig. The results remained consistent and true to the original sound and feel of the original amplifier. The only lacking ingredient was being able to adjust mic placement for a different effect, but that’s small potatoes compared to being able to profile your own amp and replicate it through the Kemper. An alternate approach in the studio could be to run the KPA through a tube power amp into a guitar speaker cabinet, just as if it were any live rig, and then mic it traditionally.
The effects are organized so that pedal-type effects are placed in front of the amp and studio-type effects are placed post-preamp section. Exploring the effects in detail would warrant an additional review, so we’ll just sum it up by saying that there are plenty of very useable, mainly bread-and-butter types of effects, that can be placed in just the right spot in your signal path for optimal sound. They’re not necessarily stellar, blockbuster effects, but still good enough that if you want to leave your big pedalboard home for the fly gig, just grab a basic MIDI foot controller and go. Or… bring your important effects and plug them in pre or post.
Documentation and Product Support
The Kemper Profiling Amplifier came equipped with “The Basics & Profiling Guide.” The booklet provides an excellent introduction to what profiling is all about before going into a very detailed “Getting Started” section introducing each function and feature of the KPA.
For a deeper dive and additional information, the Kemper website offers multiple support document downloads including “The Kemper Reference Manual” which provides even more details and explores more advanced capabilities of the unit.
Also on the website is a Community section which includes a Rig Exchange for sharing user profiles.
Price
The Kemper Profiling Amplifier (MSRP $2,190) sells for approximately $2,130 street. For the price of a modest boutique head, you can have a Kemper Profiling Amplifier, which will house multiple profiles of all your favorite amps… and your friends’ amps… and that great vintage amp in the studio across town that never leaves the room…
Considering the KPA’s full menu of functionality and ability to duplicate any amplifier to near perfection, we find the Kemper Profiling Amplifier to be well worth consideration. Tone snobs really need to give this some consideration. It’s not your Daddy’s amp modeler.
Contact Information
Kemper
www.kemper-amps.com