 Almost everyone making music these days will eventually come to a point when they need incorporate a computer into the recording process. With so many choices of sequencers on the market, it can be a difficult and daunting task to find the one that is right for your particular needs. Most familiar sequencers have been out for at least ten years or more by now, but one (relative) newcomer to the scene has created quite a stir in the last several years. This newcomer is Ableton Live, and it has pretty much turned the DAW (Digital Audio Workstation) market on its head since its release in 1999.
Ableton Live’s main advantages over other DAWs on the market are its speed and ease of use. Because almost everything can be done on the fly through a very streamlined visual interface, Live is the perfect tool to get your ideas out fast. And, due to its robust feature set, working on your sequenced projects is a joy.
| Category | Value | Rating |
| Features | 20% | |
| Usability | 25% | |
| Sound | 25% | |
| Documentation & Support | 10% | |
| Price | 20% | |
| OVERALL RATING = 3.8, which earns it a WIHO Award! 3.6 stars or better: Outstanding, WIHO Award 3 stars or better: Worth considering 2 stars or better: Suited to specific needs 1 star or less: Not recommended |
||
Features
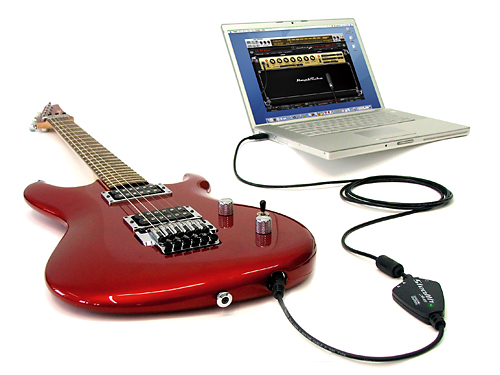
Ableton Live is a Digital Audio Workstation (DAW) that can record audio and MIDI data. The number of tracks is only limited by the power of the computer being used. It includes many audio and MIDI effects and a few software (virtual) instruments to get started making music straight away. Because it is a software solution, to record instruments (such as guitars and drums), an audio interface is also needed. Live interacted fine with various audio interfaces we tested it with from Digidesign, MOTU, and Presonus, plus it can also use the computer’s basic audio capabilities in a pinch.
Live brings many innovative and fresh ideas to the world of software sequencing, from the Session view to the warp markers. Because Live introduces a lot of new features, people may feel a bit overwhelmed at first, but we tell you now that it is definitely worth the perseverance. Live helps you overcome the initial learning curve by including features like Lessons, which are internal tutorials within the program itself that help speed up the learning process.
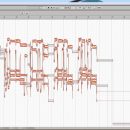
One of the biggest advantages of Live is the way it handles audio files. Instead of making the files themselves bend to the time signature of the sequence, Ableton creates a kind of mini tempo map that fits over the audio files and allows audio loops to fit seamlessly with each other. This is accomplished through a process Ableton calls warping.
Within each audio file, warp markers can be set to guide the tempo for that particular file. The interesting thing about these warp markers is that they can be moved around, thereby effectively changing the groove of the loop. For example, let’s say you have a straight kick drum on the beat, a snare on two and four, and a hi-hat on the off-beats. The trouble is, your drummer missed the last hi-hat and played it slightly off. With traditional sequencers, you could re-record the audio, or cut the hi-hat and paste it into the correct location, but with Live you can lock the last beat, move the “off” beat to the hi-hat location, and thereby adjust the tempo to fit the recording. The final result is analogous to the concept of audio quantizing (we typically quantize sequenced MIDI data). Of course, you can also use these warp markers to completely mess up the sample timing, and create some really interesting grooves from completely random samples.
Warping can also be applied to complete songs, and multiple tracks at once (great for drum recording and editing). It can also work inversely, where one file acts as the Master and the song tempo follows it. We will get into these uses of warping in the usability section.
What self-respecting DAW would be complete without effects? Live offers up a great collection of audio and MIDI effects. Aside from classic effects such as reverb, delay, chorus, flanger, compressor and EQ, Live also has some more cutting-edge effects like Beat Repeat, Grain Delay, Erosion, and Resonators. Twenty-four audio effects make for a well-rounded set. On the MIDI side of things, there is an arpeggiator plug-in and a Velocity plug-in, which is kind of like audio compression for MIDI data. This is useful for live play, and can help adjust for deficiencies in the controller keyboard.
 As for Effects specifics, here are some specs on a few key effects:
- Auto Filter – This filter has four types: Low pass, High pass, Band pass, and Notch. It also has an envelope with attack and release times, as well as an LFO that can be synced to the beat.
- Compressor II – It’s got normal controls like ratio, attack, release, threshold, and output, plus it also has a side-chain EQ with gain and frequency controls that let you really alter the compression in interesting ways.
- EQ Eight – This is just what it says: an eight-band EQ. An interesting point about the EQ is that it has three modes – Stereo (normal EQ that effects the whole stereo signal), L/R (control the EQ of the left channel and right channel independently of one another), and M/S (allows the stereo signal to be altered separately from the mono signal). M/S mode allows for some really strange and interesting EQ effects.
- Reverb – This reverb is surprisingly complex for an out-of-the-box reverb. In the Global section, there are three Qualities to choose from: Eco, Mid, High (each one takes up a different amount of CPU). Other great features in the Reverb include input EQ, Early Reflections, Diffusion EQ, and Chorus.
Live also includes basic instruments to get the user up and running straight out of the box. Impulse is a basic drum sample player and Simpler is a basic sample player. More about these in the Sound section.
The boxed version of Live also comes with an instrument library, the Essential Instrument Collection, that works with Simpler. For this library to work, Simpler actually acts like a multi-sample player to get more realistic sounds. The version we had in the studio was the download version, which didn’t include the sample library.
Speaking of effects and instruments, Ableton has introduced a nice feature in Live 6 to layer effects and instruments – Racks. These are used to group instruments and/or effects, and also allow control of user-defined parameters.
With all of these instruments and effects, it’s easy to bog your computer’s CPU down, but your love of effects shouldn’t keep you from making great music. Live now provides Deep Freeze to cover these situations. A few other programs out on the market today have a freeze function. This allows tracks with virtual instruments and/or lots of effects to be rendered to disk in a non-destructive way. When the render is done, the track becomes an audio file that plays the same sounds as the effected track, but the instruments and effects are turned Off, so the track requires significantly less CPU power.
Ableton took this idea one step further with Deep Freeze, though. In Live, when the track is frozen, basic edits can still be made to the resulting audio files. For example, if you have a drum loop that stops at measure 10, but you want it to come back in at measure 52, you don’t need to unfreeze, copy the data, and then refreeze. With Live you can just copy and past the drums wherever you want them to be on that track, even while it’s frozen. When you’ve finalized the track for good, you can then flatten it down, which takes the instruments and effects out of the track and leaves only the audio.
Recently, Ableton introduced movie imports into Live, which finally brings it into the realm of music for picture composing. Movies can be warped and adjusted to fit the tempo of the song if necessary, but because of the new Master Track feature, the song tempo can be locked into the groove of the movie (if there is one). The interesting thing is that because of Live’s unique ability to jump around the sequence timeline at the press of a button, Live can also be used as a kind of simplified VJ program – a function which it was not really intended for, but this just goes to show how creative and open this program can actually be.
Usability
Live is one of the fastest DAWs to work in, period. We found that once we got used to the interface, everything was extremely easy. From adding tracks on the fly, to manipulating loops points with key commands, to trying out loops from different tempos, Live 6 was extremely quick, solid, and flexible. This is a program that lets creativity flow, whether you’re working by yourself or with a group of people. A sequencer should be a conduit for ideas, and Live is that and so much more. Because of things like warp markers and effects racks, Live is also a facilitator of creative ideas. It seems like every time we opened up Live to work on this review we got sidetracked by some cool sound or rhythm we created.
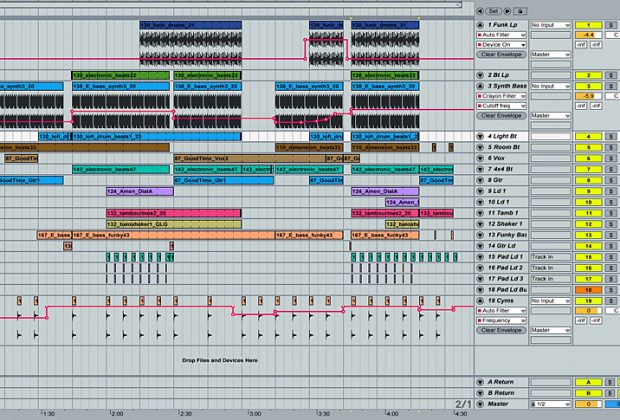
The Live View
Live has two views, or screens – Arrange and Session. Session View is similar to the mixer view of other sequencers, but the numerous Clip Slots can confuse some who are not used to them. These slots hold audio or MIDI loops or samples, and are mostly used when DJing with Live, or just auditioning new loops and samples. Although this view is very useful for certain applications, when using Live as a traditional sequencer, the Arrangement View is the one to go for. This view provides a timeline view that allows audio files and loops to be laid out horizontally.

Speed is the key getting ideas out as they come, and Live’s Arrangement View handles this very well. For example, placing the cursor at the top of the screen changes the view position and adjusts the zoom.
The main part of the screen is where the track editing takes place. The mouse-placement setup was slightly confusing at first, but as we worked with the program more, we found that it actually sped things up. After working with Live for a few weeks, we found ourselves missing this kind of functionality in other programs.
Another speed facilitator is the way audio and MIDI clips can be edited. Double-clicking a clip opens up the edit window at the bottom of the screen. If you click on another clip, that one takes the place of the previous clip for editing. If you’re working with loops, dragging either end of the clip to the left or right extends it. The whole clip is available to be clicked on for editing, but the edit window only shows the looped section. Changing data in this section affects the entire loop. If you want to change something in a certain section of the song, simply cut the clip at the point you want the change to occur and edit that new clip.
Dice & Splice
Sample editing can be done in a couple of ways. You can edit the samples and loops in the Session View, but this slightly limits what you can do as far as rearranging the parts of the loop (for example, cutting up drums). Warping can be done in this view, but to truly edit the audio, it should be taken into the Arrangement View where it can be cut up and rearranged. Song loop points can be set in Arrangement View, and copying and pasting of the audio is easily done with keyboard shortcuts. When audio clips are copied between the views, all the data within that clip (such as warp markers and envelopes) are copied as well. Audio is edited on a grid until you zoom in to view fine details in the audio section; then it changes into a kind of free mode (not locked to a grid).
Warp Your Music
As we already wrote, warping allows loops to be sync’ed to the tempo of the song. One of the best uses of this is in the ability to drag and drop audio loops into the song for trial. If the loops are cut to the bar, they will be automatically locked into the main tempo. In this way hundreds of loops can be tried out in the same space of time it would take to tempo-adjust just a couple of loops with most other programs.

Warp markers also go beyond small loops. They enable Live to be used as a DJ tool. By inserting warp markers into longer tracks, songs can be locked into the overall tempo. So if you have a song that’s at 100 BPM, and another at 110 BPM, they can be played together with no problems as long as the warp markers are set. And as if that weren’t cool enough, it doesn’t matter if the overall tempo is at 100, 110, or 125 – the song files will follow along, no problem. And you can drop loops on top of the songs to create on-the-fly remixes, too.

This can also work inversely, with the song controlling the overall tempo. If you have a live recording that fluctuates slightly in tempo, Live makes it easy to sync up MIDI and loops to that track’s natural tempo by setting it as the Master tempo. So all you have to do is put warp markers in key areas (like every four bars, or if the tempo is really all over the place, every bar) and the tempo will follow the feel of the song.
This is all well and good for DJs, but what if you’re recording things like real instruments? Well, Live’s got you covered there as well thanks to its group warping capabilities. Any audio files that are exactly the same length can be selected together and changing the warp markers for one applies to all. This is perfect for micro-editing recorded drum kits. Instead of having to edit the drum tracks individually, with Live you can do it as a group.
All of the warping features are well implemented. They make life a lot easier, and recently Ableton has been making moves to apply their fresh way of looking at tempo and grooves to normal recording situations. Features like group warping and master tempo (both of which were introduced in Version 6) are great inclusions. It’s safe to say that Ableton Live is becoming a great tool for all kinds of producers, whether you’re making electronic music or recording live bands.
Clips
All audio files and MIDI files are enclosed in clips. The interesting thing about these clips is that they can be unlinked from any real file and become homes for effects tweaks. For example, if you put a filter on an audio track, you can use an unlinked audio file to control that effect. If you have another Audio track routed to go through that track (kind of like a bus), then you have instant filter sweep! Look ma, no hands!
Granted, this is a power-user capability, but the point is that Live is extremely flexible in what it can do. Clips are just another tool in the shed for creative sonic sculpting.
Effects
Another great feature of Live is the way it deals with effects. VST plug-ins, Audio Units, and Live’s own internal effects can be dragged right into the effects section and inserted anywhere in the effect chain. Effects can also be dragged around within the effects chain, which makes it very easy to change the sound. For example, drums with compression and some reverb sound great, but what if you put the compression after the reverb? We had a great time trying out all kinds of signal flows with our effects. It should be noted that most other DAWs on the market also allow for changing the effect order, but Live makes the process extremely easy to do, which keeps with their speedy workflow mentality.
Another bonus about the effects that ship with Live is that they sound great and don’t overly drain the computer’s CPU.
When dealing with third party effects, Live also has a nice way of displaying the MIDI controllable parameters. A little triangle next to the effect power button opens and closes the parameters box and allows for easy MIDI mapping to all map-able parameters.
Instruments
Live offers two instruments to get people up and running straight out of the box; Impulse (drums), and Simpler (samples). Both of these instruments are very basic, but they are easy to use.

Impulse is especially useful if you have a lot of drum samples and you want to throw them in the song quickly. The Live download includes some basic drum samples, and more are available as free downloads on the Ableton website. A variety of kits are included with the downloads, and these are great places to get started building your own kits from. Changing out individual drum samples is a snap. Just click on the little recycle button in the lower right corner of the sample you want to change and it will bring up the library window on the left. This window allows searching for new samples by keyword, or just clicking through folders on the computer.

Simpler can play back one sample like an instrument. Granted, this doesn’t sound the greatest depending on the sound used, but it gets the job done. Ableton have also posted additional Simpler sounds on their website to get things rolling. These sounds include patches that use multi-samples (multiple samples for different instrument ranges) for more realism. These multi-samples are already included in the sound, as user-created Simpler patches can’t incorporate multi-samples.
Rack ‘em Up
Like we said earlier, Racks are nice features in Live. There are two kinds of racks – instrument racks and effect racks, but they are pretty much the same in what they do. Racks allow users to group instruments and effects together and control them in a number of interesting ways. This can be useful for creating keyboard splits and velocity layers. We hooked our electronic drum kit up and used multiple Impulse instruments to create velocity-layered drums. The final effect was that when we played soft, one drum kit was triggered, and as we played harder, another drum kit was triggered.
The racks were very easy to use. Just like the normal effects section, modules can be dragged around to change the signal flow on the fly. If you want to add another effect, just drag it in. Changing keyboard splits and velocity layers was also easy because of the visual interface, which feels very similar to the rest of the program.
Control Freak
Almost everything can be controlled by MIDI within Live. That’s a seemingly innocuous sentence, but it carries a lot of weight. The control is set by MIDI Learn, which means putting Live into MIDI “learn” mode, clicking on the parameter you want to control, and then twisting the knob or pushing the button/key. It couldn’t be easier. Single controls can also be assigned to multiple parameters, and the amount of control can be adjusted or even reversed. For example, if you want a knob to turn one effect Off while turning another On, just set the first effect to On, and the second effect to Off, and when the knob is twisted, it will reverse the settings. This also works for things like filter frequency, EQ, chorus, delay, etc.
But what if you don’t want to take any MIDI gear to a gig? The good news is that you can also assign all the keys on your computer keyboard to control clips, effects, events, etc. The better news is that the key commands are case sensitive, which allows for up to fifty-two different On/Off switches. The only bad news is that because keys on a computer keyboard are only On or Off, there are no sliding parameters. However, you can define the maximum and minimum values for yourself, so rather than Off being zero and On being 100%, you can set the values to any maximum or minimum. These keyboard assignments are made the same way that the MIDI assignments are made, which was a very painless process.
Still Work to Be Done
Although Live is a great, well-rounded DAW, there are a few areas that still need work. MIDI tracks were only introduced in version 4, and it shows. Although everything that needs to be done can be done, there are some things that could be added to make life easier on the MIDI front. We’d love to see more MIDI note control features such as non-destructive track quantize and transpose. And speaking of transpose, there is no transpose menu function. This is a much-needed addition.
The audio side of Ableton, while very solid, can still use a couple of tweaks here and there. For instance, there are no cross-fade functions. It is possible to do fades with the clip envelopes, but cross-fading is still unavailable, even in Live 6.
Sound
Finally, we get to talk about one of our favorite aspects of Live – the quality of the effects that ship with the program. They are fantastic! They sound excellent and don’t put undue strain on the CPU, especially on dual-core Intel Macs like our test system.
Some favorite effects of ours were the Auto Filter, Compressor II, EQ Eight, Reverb, and Simple Delay. We loved these especially because they are rock solid: they do the job that needs to be done, and they do it well. In particular, the EQ Eight and Auto-Filter don’t color the sound when they’re set to normal (but if they are needed, they can really carve out the sonic spectrum as needed). The Compressor II and Reverb were also very nice for factory plug-ins. We usually find compressors that come with DAWs to be a bit lackluster, but this one does a great job, and we found ourselves using it on numerous tracks. Likewise for our feeling about included reverbs. Live’s Reverb doesn’t muddy up the mix, especially when used in High Quality mode. In the cases where CPU power is more important than sound quality, simply use the reverb in Eco (economy) mode, which still offers an adequate sound for live performance.
The instruments also sound good. Impulse works well with drum hits. It also has basic sound shaping tools (filter, envelope, volume, pan, etc.) to fine-tune the samples. The Simpler instrument is less useful because it is not multi-sample friendly. Because it only uses one sample, that sample quickly looses its realistic sound once you play it more than a few notes away from the root note. This is fine for longer drum hits, some basses, and sound effects, but it doesn’t do justice to real instruments.
The boxed version of Live comes with a fifteen GB sample library containing all the basic sounds needed to make music. Because we are reviewing the download version of the program, we didn’t have access to these sounds.
Documentation and Product Support
For those just getting started with Live 6, it is important to note that because of its original approach to music creation, Live may seem a little strange at first. But we found that although there was a slight hump to overcome while we adjusted our way of thinking from using other sequencers, it paid off in the end because of the great features that Live offers.
The folks at Ableton seem to know that they’ve got something unique on their hands, and that’s why they’ve included a built-in tutorial with the program. Yes, that’s right. Live has a tutorial that’s easily accessible any time you have a question about something or want to learn how to use a feature. This came in really handy when we first got our hands on the program and were just starting off, but it also became a great go-to while working on music if we had a question about any part of the program. The tutorial (called Live Lessons) integrates seamlessly with the program (it even opens up in a side window) and is easy to navigate.
The manual is also very well thought-out and the PDF version has everything we want a PDF manual to have. It seems to be programmed to be a PDF, and not just scanned in. The size is perfect for the screen (not too big), and the index is linked, so if you look something up, you can just click on the page number in the index and it takes you right to that spot in the text. We found this extremely useful and time saving. If we had a question about how to use the Racks feature, we just went to R, found Racks, and clicked on the sub-topic we wanted to read about. BAM! We were taken right there, with no fuss or hassle.
Price
Although Live is very reasonably priced, we would like to see a few different price points for different users. Recently, Ableton began packaging Live with the Essential Instrument Collection, which is great for budding producers or people looking for more sounds. But what if you already have a great sound library and you don’t want another one? Well, you can purchase the download of Live through Ableton’s online shop, but that price is the same as buying Live (bundled with the instrument library) in most stores. We feel it would be fair to offer the download version (with no instrument library) for (perhaps) $100 less, which would put it in the same price range that the boxed edition used to sell for before it was bundled with the instrument library.
Having said that, though, Ableton does pack a lot in for the price, which is still less than the full versions many other DAWs.
Other Comments
In the review, we covered the two main instruments that ship with Live: Impulse and Simpler. It should be noted that there are also two more instruments that can be bought through the Ableton website. These are Sampler, a full-featured sample player with non-destructive editing features, and Operator, an FM synth. Because they aren’t included in either the download or the box version, we didn’t go into detail here, but if you are interested in either item you can find out more info at the Ableton website.
Contact Information
Ableton
http://www.ableton.com
| Evaluation Short-List |
|