Hi all, and welcome to the first installment of a multi-part series on miking for electric guitars. Throughout this series, we’ll take a look at microphone selection, various techniques for mic placement, sound isolation, using multiple mics on a source, EQing and compression techniques, and mixing strategies. We’ll also focus on various genres of music and producing the sounds that are most commonly associated with them. Throughout this comprehensive series, I’ll provide the basis for a more technical understanding of microphone usage in the studio, as well as offer practical insight into obtaining the sounds you’re after.
Forget What You Think You Know
It truly amazes me how many guitarists and inexperienced engineers believe that all it takes to capture great guitar tones on disk is to simply place an SM57 in front of a 4 x 12 cabinet and turn it to eleven. If only it were this easy! Alas, this belief is usually shattered upon first playback after tracking, or upon comparison to guitar sounds on commercially available CDs. The bar for production values has been raised considerably in recent years, and even if you can live with mediocre recorded guitar tones, chances are good that the industry people you are shopping your demo/indie release to won’t be satisfied.
It’s time to forget what you think you know about recording guitars and learn some new techniques. Fortunately, if you’re the kind of serious musician taking the time to visit MusicPlayers.com and read this article in the first place, then chances are good that you are not prepared, by any means, to live with mediocre recorded guitar tones! Be assured, this is a good thing… And I’m right here to help you!
Begin at the Beginning
In our initial installment, I’ll first provide an overview of the process for producing great guitar sounds. First and foremost, great recorded guitar tone begins with a great guitar tone. This sounds simple enough, and quite obvious to many, but I am constantly surprised by the number of musicians and engineers who try to create great sounds from poor ones.
If the guitar sound that you are recording does not sound right when played along with the rest of the band, or (more accurately) with the other recorded tracks for the session, you need to spend more time adjusting the actual sound source before trying to “fix it in the mix”. Unless you are making an artistic decision to create a unique specific purpose tone, the recording stage is not the place to try and dial-in your basic sound.
Things to focus on at this stage are: equipment selection, amp and guitar settings, room treatment (or selection of various recording spaces when this is a viable option), and technique (yes, technique has a big impact on tone). My own philosophy for engineering great guitar tone is to start with great guitar tone in the room and record it as transparently as possible. Then, make subtle adjustments in the mixing stage to help your guitar performance sit well alongside the other tracks in the mix.
Once you have your guitar and amp tone really happening (once gain, being sure to take into account the ambience that the room is adding), that’s when the real work begins…
Microphone Selection
We’ll begin here with microphone selection. There are numerous microphones used today for recording electric guitar, and it can be quite overwhelming to try and determine which microphone will work best for you. Real world considerations such as expense are going to impact your options as greatly as anything else, so we’ll certainly consider this in our discussion. Before we explore differences in microphones, it makes the most sense to first look at their similarities.
Microphone Grouping – The Mad Science and Sonic DNA
Let’s begin by grouping prospective microphones into three general classifications: Dynamic, Condenser, and Ribbon Microphones.
Dynamic
Moving-coil dynamic microphones operate on the principle of electromagnetic induction. In layman’s terms, a voice coil, or finely wrapped coil of wire, is suspended within a magnetic field that is created by a permanent magnet. This voice coil is attached at one end to a small Mylar diaphragm located in the front/face of the mic.
When sound pressure exerts a force on the diaphragm, it moves the voice coil. As the voice coil moves, it cuts across the lines of the magnetic flux created by the magnet. As this happens, displacement of the diaphragm (which is proportional to the frequency of the sound wave) generates an electrical signal across the leads of the voice coil. One popular dynamic microphone is the Shure SM57.
In comparison to condenser and ribbon microphones, the relatively large physical mass of the element requires a greater relative amount of force to move the voice coil. Because of this, dynamic mics are slower to react to and subsequently less sensitive to subtle changes in sound pressure than the other mic types. This slower transient response results in a “rounder”, less detailed reproduction of the sound source.
Some engineers purposely seek to use this sonic characteristic to reduce the “fizziness” of a specific high-gain guitar amp. In other applications, though, the recorded signal may seem a bit unfocussed when compared to the source or to tracks recorded with condenser or ribbon microphones. However, one distinct advantage that dynamic designs tend have over others is that they tend to be more ruggedly built and are often able to handle higher SPL’s (sound pressure levels) than other types without the use of pads (signal attenuating circuitry), which can make them well suited to recording electric guitar.
Condenser including polarized (“true”) condensers versus electret condensers, and tube versus solid state FET designs
Condenser microphones operate on the principle of electrostatics. This is a bit harder to describe without getting too far into the mad science of physics and engineering (if you are interested in a more detailed understanding of this, there are many sources available in print that go into greater depth regarding microphone design as well as electrostatics in general).
Within the capsule of the condenser microphone exists a type of capacitor. Historically, capacitors were first known as condensers, which is where the name of this microphone design is derived from. This particular capacitor is formed by two thin plates. One of these plates is fixed and the other is moveable, attached to a diaphragm. The actual capacitance is determined by a number of factors including the surface area and composition of the plates, the dielectric (material between the plates, which in the case of a condenser mic is air), and the distance between these plates.
Understanding that the distance between the plates affects the capacitance is critical to our purpose here. As sound pressure exerts a force on the diaphragm, the space between the plates is reduced and the capacitance is increased. In most designs, the plates are connected to opposite sides of a DC power supply. A resistor is then wired between the plates, and electrons are drawn from the plate connected to the positive side of the power supply and flow to the plate connected to the negative side. This happens until an equilibrium is reached whereby the difference in charge between the plates is equal to the capacitance of the capsule, multiplied by the polarizing voltage from the DC supply.
Hang in there – we’re almost through the science! Once things are at equilibrium, no more current flows. Now remember we said capacitance is affected by the distance between the plates. If we change that distance somehow, this equilibrium will cease to exist and current will flow again. As sound pressure moves the diaphragm, the distance between the plates is reduced, capacitance is increased, and current begins to flow until things return to an equilibrium.
In essence, the voltage across that resistor (which is proportional to the capacitance) becomes the output signal. Because this signal is of very high impedance, an impedance conversion amplifier is required. This is typically housed within the microphone body and is one of the reasons why a condenser microphone requires a power supply voltage in order to operate (often provided via phantom power from the mic preamp or mixing console).
As you may have noticed, some condenser mics use tubes and some do not. While most modern designs make use of a FET (Field Effect Transistor) due to the reduction in capsule impedance that this design offers, some more classic designs instead use a vacuum tube housed within the mic itself. As with the case of guitar amplifiers and microphone preamps, tube designs tend to impart a certain coloration of the sound of the mic, and when pushed will overdrive in a more pleasing way (due in part to the even-order harmonic distortion that occurs with overdriven tubes).
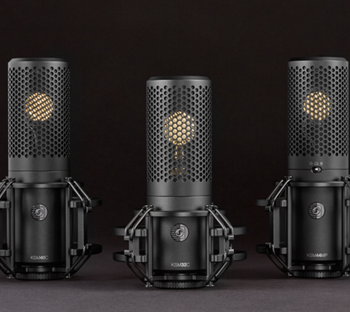
Additionally, there are condenser microphone designs that operate similar to the design above, but the polarizing charge is permanently stored on the backplate or within the diaphragm. An impedance-changing amplifier is still employed, so external power is still necessary. One example of a polarized (true) condenser microphone is the AKG C414-ULS, while Shure’s KSM32 provides an example of an electret condenser microphone.
Condenser microphones have excellent transient response due to their lighter-weight elements. This results in a very detailed sound. Out of the three categories of mics described here, condensers have the lightest elements and therefore the best transient response, which accounts for their perceived sonic clarity.
However, their design often requires the use of a pad (often included as a switchable feature on the microphone body) to prevent overloading at high SPL’s. They are also less rugged than dynamic designs and require gentler handling in order to retain optimum working condition. Also due their design, they require phantom power (or some other sort of power supply) to function.
Large diaphragm condensers (such as the C414-ULS) have excellent bass frequency response. Often, high pass filters (to roll off bass frequencies below a set value) are included as a switchable feature on the microphone body (as in the case described above with pads) to reduce overly prominent bass energy created either by a bass-heavy sound source or from the proximity effect of mic placement.
Small diaphragm condensers such as the Shure SM81 offer increased treble response but slightly compromised bass response compared to their larger diaphragm cousins. This can be an ideal characteristic when trying to capture the presence and air behind a guitar sound. As you’re now imagining, combining multiple types of microphones may enable you to record precisely the sound that has been eluding you. The multiple-microphone approach is one trick that I employ when miking my own guitar sounds (we’ll get more into these techniques further along in this series).
Ribbon
Ribbon microphones operate on the principle of electromagnetic induction, similarly to moving-coil dynamic microphones. The diaphragms used in this case, however, are much smaller and much lighter than dynamic designs. The ribbon mic’s diaphragm is typically aluminum (although modern design technology is enabling the use of other materials) and resembles a thin, corrugated (yep, you guessed it!) ribbon. The impedance of the element is very low due to its short length, so a step-up transformer is required to bring the output impedance to an acceptable range. An example of a ribbon microphone is the Royer Labs R121.
The transient response of a ribbon microphone is somewhere between that of a moving-coil dynamic and a condenser. One of the mics I currently hear a lot of buzz about for Miking electric guitar cabinets from the engineers I know is the Royer R121. One of the reasons for this, I believe, is because ribbon microphones tend to have a reputation for yielding a very natural, open sound. They typically are not as bright as condenser microphones (which can sometimes sound harsh in some applications).
With ribbon mics, impedance matching between the pre-amp and microphone is critical for proper performance. Impedance mis-matching will improperly load the ribbon, resulting most notably in a loss of low end, lowered sensitivity, and less overall body to the sound. New designs are emerging, however, that utilize phantom power (traditional ribbon microphones do not use phantom power, and can even be destroyed by connection to a phantom power source!) and circuitry to make impedance matching a non-issue.
Another great feature of ribbon microphones is that many (but not all) designs cannot handle high SPL’s.
Patterns in the Pick-Up Scene
Next, let’s discuss the various basic pick-up patterns: Cardioid, Hyper-Cardioid, Figure Eight, and Omni-Directional. Basically, what we’re talking about here is the directional response of a microphone. While frequency response measures dB’s versus frequency (see below), polar response measures output sensitivity versus angle of incidence, in degrees, where 0° is on-axis and 180° is at the microphone’s rear. This information identifies for us how wide/narrow the microphone’s “field of view” is, or rather how off-axis a sound source can be without incurring a noticeable amount of attenuation with regards to the microphone’s response. See the following illustrations for reference:
| Cardioid | Hyper-Cardioid |
 |
 |
| Figure 8 | Omni-Directional |
 |
 |
| © 2006 MusicPlayers.com LLC. | |
Getting “Freq-y”
Now, let’s talk about frequency response, both on- and off-axis. On-axis frequency response is simply a quantitative measurement of the microphone output over some audible frequency range (usually 20 Hz to 20 KHz) given a constant input signal directly on-axis to the microphone (the straight line running normal to the diaphragm’s center). The graph of this is plotted in dB versus frequency, and it will provide you important information as to how the microphone will react to the sound source it “sees” directly in front of it.
Off-axis frequency response is charted similarly, but will often include a measurement of the angle (or angles in the case of multiple graphs) of offset from on-axis. This will give you important information regarding how the mic reacts to any sound source(s) that it sees at an angle offset to its on-axis view. Response can sometimes be dramatically different than the on-axis response, and is an important consideration when choosing a mic for any application where other sources may bleed significantly into the mic. Examples include both the obvious room ambience (in the case of distant Miking) and the less obvious but important detail – other speakers in the same cabinet when close-Miking for guitar recording.
The Fine Print
Finally, it is important to be aware of other considerations such as how a mic reacts to proximity effect (the increase in bass response when a mic is in close position to its source), phantom power (requirements and cautions as talked about earlier), interaction with the mic pre-amp due to impedance (as in the case of ribbon mics), SPL ratings, overload characteristics, and switchable pads and filters.
Also, it’s important to be aware of sensitivity ratings (the output level that a particular microphone produces given a specific input signal) and noise ratings (self-noise), particularly for recording at lower volume levels (such as in an apartment or in a roommate living situation).
Thinning the Herd
Once you understand the information presented above, it becomes much easier to narrow down your microphone selections. We do this by categorical association and elimination.
Huh? Let’s put it this way… When you were choosing a guitar, you had to make decisions about body wood, neck wood, fret-board material, scale length, type of pick-ups, feel, aesthetics, etc. You may not have realized it at the time, but you were making a lot of categorical decisions that would help you choose another guitar later on or recommend one to someone else.
If you eventually settled on a Les Paul and you were later looking for a guitar with some tonal similarity, but perhaps a different feel and some refinements in the sound, you would have a solid foundation for narrowing your search before you even began. You may decide to look into a PRS, another high-end guitar with dual humbuckers, a mahogany body and set-neck construction. You probably wouldn’t decide to audition a Strat, which is bound to sound incredibly different just from understanding that it is an alder body guitar with single coil pickups.
As with choosing guitars, selecting a microphone takes some time and some patience. It can also be a more difficult process for many, because it is more difficult to go into a busy store and A/B microphones. Any store worth your business, however, will allow you to do this either in the store or at home (purchasing two mics with the guaranteed ability to return one for a refund and not just store credit).
In practical application, if after A/B-ing a few microphones you find that what you are looking for is the more detailed reproduction of a good condenser mic versus the slower transient response of a dynamic, you can move your search away from an entire category of microphones. You can then further refine your search by comparing large diaphragm and small diaphragm condensers to see if you prefer the bigger bass response of the former, or the tighter treble response of the latter.
Then, you may notice that one particular mic sounds overly bright to your ears in comparison to another of similar specs, and if you then look at the frequency response curve, you can note if this is implied by the graph or if this happens to be a sonic characteristic of that particular manufacturer’s mic. At this point, you may be starting to formulate ideas about what you prefer, and you can compare mics with similar designs and frequency response curves that you feel may best suite your application. Once you get this far, it simply becomes a matter of choosing between the limited number of models that fit your chosen specs within your price range.
Last, don’t just choose a mic from its specs. You have to audition them. Music is, after all, about listening. For your application, you may like the sound of a $200 microphone more than the sound of a $1,000 “ideally spec’d” mic. As with guitars, amplifiers, and all things musical, listening tests are often times more important in your final decision than the technical specifications.
A Safe Place to Start
For those of you who like to start your search with a few recommendations, I’ll tell you about some of the more widely used mics that I have a personal preference for in each category:
For dynamic mics, a few of my favorites are the venerable Shure SM57 (the original, not the Beta 57) and the Sennheiser MD421 (current model: MD 421 II) and e609 (current model: e606).
For condenser mics, I like the Shure KSM32 and SM81, the Blue Dragonfly, and the AKG C414 B-ULS (current model C414 B-XL II).
For ribbon mics, I am a fan of the Royer Labs R121 (when paired with an appropriate mic pre-amp), and am eager to audition the newer R122.
Your Assignment
With all this newfound knowledge fresh on you mind, your homework until our next installment is to go out and listen to a few models in each category. Take some notes as you listen, comparing categories, manufacturers, and models. Afterward, take a look at the frequency diagrams on the manufacturers’ websites along with other specs and see if you can draw parallels with what your ears told you.
This takes a bit of time and experience, but the exercise is worth it. By understanding the inherent characteristics of the different categories of microphones, and by careful analysis of the spec sheets, you will eventually be able to make educated decisions about mic choices for various applications – not just miking for electric guitar – before you even listen to a microphone.
In our next installment in this series, we’ll take a look at various techniques for mic placement and sound isolation. As we continue with our journey, we’ll build on this knowledge and explore the use of multiple mics on a source, EQing and compression techniques, and mixing strategies.
See you soon, and if you have any questions, feel free to post them in our recording forum.