Multiple studios, Internet Collaboration, and more…
 I was going to call this feature “How to Record a Hit Album,” but that would have been a bit premature, and I didn’t want to wait a year until publishing it [insert snare hit and small cymbal crash here]. However, having just released an album created with some outstanding musicians, engineers, and legendary rock producer Ron Nevison, I knew there was much from our experience that would be of interest to other musicians trying to produce their magnum opus. And what started out to be a tutorial ended up reading more like a blog, or just an in-depth, behind-the-scenes look at the making of our album, complete with detailed notes, gear tips, and studio tips.
 Along the way, producing this album took advantage of the latest technologies as well as some tried and true classics. There was remote collaboration with musicians and producers over the Internet, classic analog SSL gear and modern Pro Tools rigs, tone-worthy tube amps and modeled virtual instruments, lust-worthy multi-million dollar studios, comfortable project studios, home studios, guest artists, and more.
In this feature, we’re going to look at all aspects of the project from the planning stage through the recording process.
The Product (and the Band)
The Sky Is Falling is an hour-long melodic progressive rock concept album from the band Days Before Tomorrow. We’re often telling people that virtually everyone who writes for MusicPlayers.com is, in fact, a professional musician, and quite a few people on our team were part of this recording. Myself, senior guitar editor Derek Davodowich, and drums editor Jason Gianni are members of Days Before Tomorrow, and keyboard editor Jason Buchwald, a former bandmate (he relocated to Arizona last year), also contributed to the CD (not to mention the band's other musicians who are not affiliated with MusicPlayers.com).
Planning
So how do you make a big budget album these days? Simple — start with a small budget and then ignore it completely! What started out as a $10,000 project during the conception phase ultimately morphed into something closer to the $50,000 mark. We’re not moaning about that like some of you may be thinking, even though we have to eat nothing but Ramen noodles for the next two years. Our concept for the project just happened to evolve as various people became involved with it, and we were fortunate enough (financially) to be able to take advantage of the opportunities presented to us. If your band lacks solid financial backing, though, you should consider your budget quite specifically before you begin, or else you could end up running out of money after tracking only the first few songs.
What is your goal? A self-produced indie record of “typical” quality production-wise? A three-song EP with radio-ready singles? You don’t have to spend a mint to create a “typical” record if your band has good songs and you know how to play your instruments well. But you’re still going to spend a few thousand dollars at a minimum to produce anything of reasonable quality. In our case, though, we wanted far more than just a typical record. We wanted the quality of a major label production despite the lack of being signed to one.
We have our own Pro Tools project studios, and engineering and production experience, so we could have chosen to just make the record for ourselves and drastically reduced our costs. But we wanted to create something that was better than anything we could produce for ourselves in a reasonable amount of time. This decision dictated that we would bring in outside production and engineering expertise where it would make the most difference in our results:
- Production: throughout the entire process, to have an honest and experienced ear providing unbiased feedback and direction
- Engineering: primarily in the key areas of drum and vocal recording
- Mixing: because we’re good but not as good as we were looking for on this release
Working with a production and engineering team outside of our band meant that we would need to use pro studios for some of the tracking (but not all), and of course a great room with fabulous gear for mixing.
Selecting a Producer, and Preproduction
Finding someone to produce your CD really isn’t that hard — affording their services is a different story. An Internet or MySpace search will turn up many producers, and all it takes is a trip to your CD collection to find out who produces music that you like. Unlike trying to send a message to your favorite musical artist, producers don’t receive nearly the same volume of email, so it’s very likely that if you approach the right producer with a nicely written email introduction, they are very likely to review your demo material and respond to you as their time permits.
You have a solid demo, right? Forget about shopping for an A-list producer if you haven’t recorded anything yet. We recorded and mixed demos in our own studio for roughly half the tracks on our CD. Not only did this process help us to work through some rough edges musically, but also it gave us a product that was good enough to let a producer listen to. This wasn’t album-deal-shopping demo stuff, and it wasn’t even mastered. But it was solid recordings and mixes that would enable someone to get a good feel for the sound, style, and general abilities of our band.
We spoke with quite a few well-known producers whom we felt had something in their background that made them a good fit for our music, and the response was overwhelmingly positive. But don’t waste a producer’s time if they typically work in other genres of music than yours. Sending a hip-hop demo to a rock producer is going to be a waste of their time, and you’ll be lucky to hear back from them at all. (If, however, you just read an interview with that producer and he/she mentioned wishing they could get involved with someone in your genre, then that’s obviously a different story.)
Little did we realize that we would end up working with a legendary producer, but as it turns out, the stars were aligned just right and our material struck a chord with Ron Nevison, the man largely responsible for defining the recorded sound of melodic hard rock in the late ‘70s and throughout the ‘80s. If your CD collection contains major rock records from those periods, it would be hard for it to not include some of Ron Nevison’s work since his credits read like a who’s who of rock: Led Zeppelin, The Who, Heart, Bad Company, Jefferson Starship, Ozzy Osbourne, Kiss, Europe, Damn Yankees, Survivor, and many more. Ron routinely worked with bands featuring strong lead singers, huge vocal harmonies, and lavishly orchestrated productions — just the elements we incorporated in our band’s sound.
Ron lived across the country from our band, which would have presented some logistical and expensive hurdles if this record were being made ten or twenty years ago — either he or the band would have needed to relocate somewhere for the duration of the recording project. But in this day of the Internet, distance wasn’t a problem.
As we developed the remaining songs for the album, we would upload our demos to a private FTP server of ours to share with Ron. He would comment on things, make suggestions, we would make changes and then share new recordings with him. Once it was closer to tracking time, though, we budgeted a few extra days in the schedule for in-person preproduction work.
The Recording Process
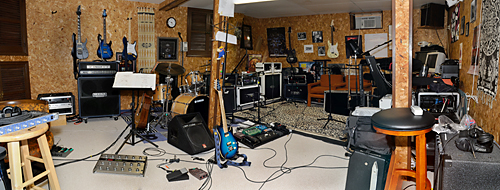
There was no reason not to make extensive use of my Pro Tools studio, House on the Hill, wherever we could on the CD. All it needed was a handful of equipment upgrades to take the recording signal chain from “decent” quality to pro studio standards — a cheaper alternative than spending extra days recording in a larger studio with the added benefit of us still owning the gear for future recordings.
At the heart of my current studio is a Digidesign 002r attached to an Apple Macintosh Pro. Obviously, the onboard preamps in the 002 (and newer 003 series) aren’t as good as top-flight pro studio gear, but behold the power of ADAT! The ADAT Lightpipe optical interfaces on the 002 and 003 products (and Mbox Pro) enable you to connect external analog-to-digital (A/D) converters, and subsequently any high-end preamps you desire. I upgraded my studio with the Apogee Rosetta 800 — a “studio standard” interface with eight channels of I/O, and then mixed and matched a few different preamps including the fantastic ADL 600. Paired with an assortment of great mikes, my signal chain could now rival any pro studio.
We did, however, need a larger studio for tracking drums. Of all the instruments being recorded on a rock record, the acoustic properties of the room have the largest impact on the quality of the drum sounds. Plus, miking a large drum kit requires access to more mics and preamps than my project studio could easily accommodate. The solution to this was to record our drums, bass, and some scratch tracks, in a pro studio.
At the start of recording, Ron Nevison flew to NJ and spent three or four days with us in our studio, working on preproduction in detail. We fine-tuned the songs, changed some musical arrangements, created a few new parts and transitions, and really just got the songs into their final arrangement so that time in the pro studio could be minimized. It definitely makes more economic sense to figure out what you’re going to record before you enter the studio rather than paying for your experimentation time.
As part of the preproduction process, we also confirmed precise tempos for the click tracks we would be using on most of the songs. It’s easy to get caught up in the excitement of recording (just like playing a live show) and end up recording a song faster than you really intended, so settling the tempo issue before you hit the studio can be helpful.
After preproduction, we moved into Estate Sound for a couple of days with the goal of tracking all the final drums and bass parts, along with scratch tracks of basic guitar parts, some of the keyboards, and a guide vocal, which would all be replaced later. We didn’t concern ourselves with nailing all the parts — in fact, much of the detail wasn’t yet figured out on some songs, but in order to capture a real live vibe in the recording, it was essential that we all played while we were tracking drums and bass.
Estate Sound is a very comfortable, small, pro studio located in suburban Short Hills, NJ, literally built on the property of an estate. We tracked drums and bass there earlier in the year (for a single we released on a compilation CD), and had a great experience working with lead engineer Josh Gannet and studio owner Matt Aidekman (Josh is now a regular contributor to MusicPlayers.com, too).
To get the drums sounding as good as possible for our CD, we brought in a mutual friend of ours and Matt’s — Grammy award-winning engineer Earl Cohen, to help dial in the drum sound. Earl’s credits include Christina Aguilera, Tina Turner, Pink, Cyndi Lauper, Usher, Anita Baker, Will Smith, and others, but he’s actually a rocker at heart whose favorite artists are Genesis and Peter Gabriel (a great fit with us musically). He came for the drums and stayed for the album mix, but we’ll get back to that later in the story.
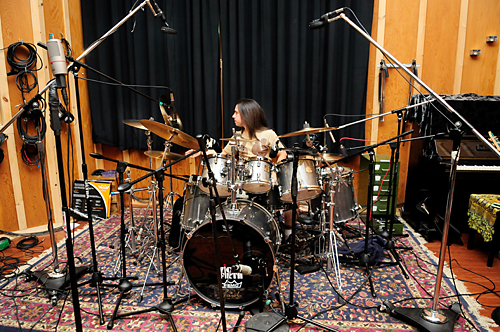
Jason Gianni tracking drums at Estate Sound.
While there are numerous software platforms that you can use in a home studio environment (Sonar, Logic, Live), one of the benefits of the Digidesign Pro Tools platform is its universal accessibility. Virtually every studio has it. Whether using Pro Tools LE in a project studio or Pro Tools HD in the pro studio, session files can move seamlessly from one environment to the other.
Originally, we planned to track the bass using a combination of our bassist’s Direct Out from his Carvin B1500 head along with miking his 410 cabinet, but the direct sound (with the amp’s EQ mostly flat and some dirt dialed in from the “Drive” control) sat so nicely in the mix that we didn’t even bother with the cabinet.
Once the drums and bass were recorded, we brought our hard drive back to House on the Hill to commence recording guitars and keyboards. This phase of the recording took place over the next few months. Because we weren’t working on the clock, Derek and I had plenty of time to experiment with different guitars, different amps, and of course, different musical ideas.
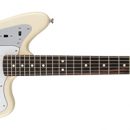
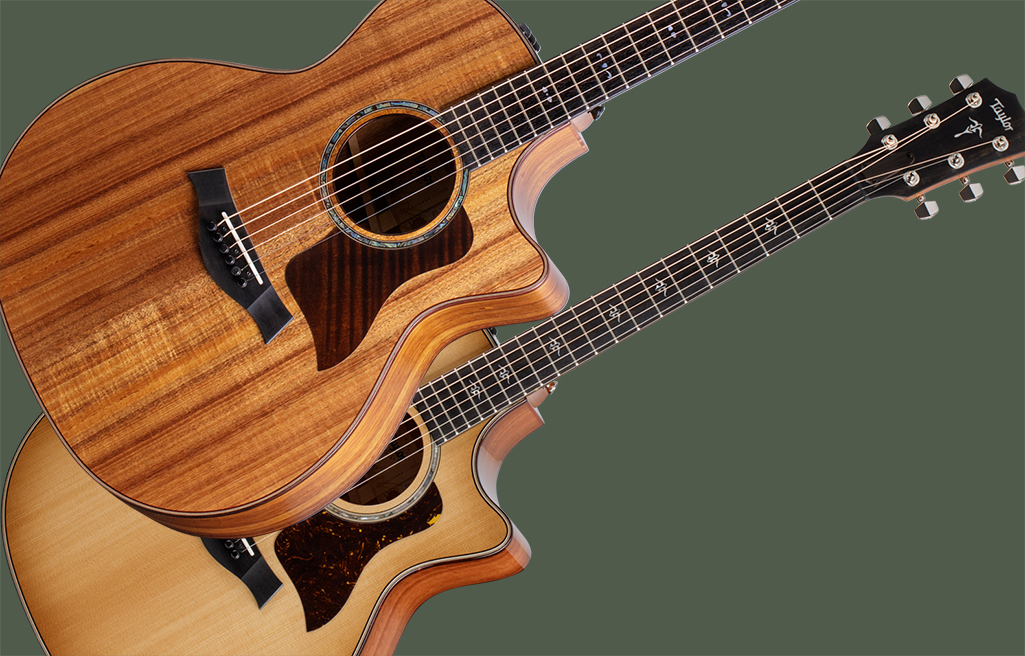
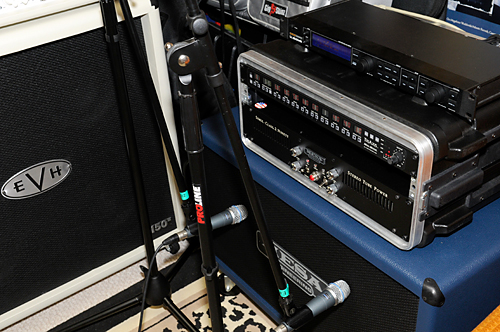
The majority of the album was recorded with Mesa/Boogie amps: a Dual Rectifier Road King II and a Dual Rectifier Tremoverb, plus a Triaxis/2:Ninety rig. We also used an EVH 5150 III, Fender Super-Sonic, and a vintage mod’ed Marshall head of Derek’s that used to belong to Al DiMeola. Electric guitars were primarily a variety of Ernie Ball Music Man and Ibanez instruments, and acoustics were primarily from Taylor and Martin (Zeek keeps it all pretty straightforward with a pair of Yamaha John Myung signature six-string basses).
With Ron Nevison back at home on the Western seaboard, we relied heavily on remote collaboration during the guitar tracking. There was a lot of back-and-forth during this process, as Ron didn’t always care for the ideas we came up with. Derek and I will never forget one particular song in which we must have cut ten different instrumental solo sections before getting one that Ron felt had the right vibe for the song.
We tracked guitars with a combination of mics — typically two dynamic mics on axis (Shure SM-57 and Beta 57a), close to the grill and a few inches in from the outer edge of the speaker baffle, and one condenser room mic (Audio Technica AT-40300 SE or Shure KSM 44) a few feet back. This is a pretty traditional (and proven) approach, and while many engineers like to pair a Sennheiser MD 421 with an SM-57, during our testing of the Beta 57a for a MusicPlayers.com product review, we found that the combination of this mic with the SM-57 was truly exceptional sounding.
Each guitar was recorded to three tracks, which led to as many as thirty or so guitar tracks per song. Before mixing, we spent time determining the optimal tone balance between the mics and then bounced each performance down to a single track. This facilitated easier mixing, and we could always go back to the source material if the tone we created needed some tweaking.
Acoustic guitars were tracked using multiple mics as well. We used a combination of dynamic and condenser mics, plus the onboard piezo pickups to capture our acoustic tones.
While we were busy working on the guitar parts, keyboard tracks for some of the songs were recorded by our former keyboard player, Jason, from his home studio in Scottsdale, Arizona. Using Pro Tools LE in his studio, it was easy for Jason to record keyboard parts and FTP us the audio files and session data for us to import. In some cases, we each had the same virtual instruments, making the files extremely small and fast to upload/download. In cases where we didn’t have the same plug-ins at both locations, Jason printed the virtual tracks to audio files before sending them to us.
Most of the other keyboard parts were recorded by me, with the notable exception of guest classical pianist Huub Douma arranging and performing the blistering piano performance on "Wasted Years I: Confrontation." Our drummer, Jason Gianni, played the cool piano line in "Can't Do Anything."
We made wide use of plug-ins in the Arturia V-Synth Collection on the CD: especially their virtual ARP 2600, Prophet 5, Minimoog, and Roland Jupiter 8. The beautiful Steinway grand piano heard throughout the recording? After a virtual instrument grand piano shootout, Native Instruments Akoustik Piano ended up being our piano of choice, played from an 88-note weighted Korg Triton keyboard. Many of the modern synth sounds were provided by Digidesign's Hybrid virtual synthesizer (which you can get bundled as part of the Digidesign Music Production Toolkit).
After all the guitar rhythm tracks were recorded, as well as the basic keyboard parts, Ron Nevison came back to NJ for another ten days or so to track our lead vocals with Eric and engineer Josh Gannet at Estate Sound.
The first day in the studio was spent exploring different combinations of microphones and preamps to find just the right set of gear that sounded best with Eric’s soprano voice. We rented multiple vintage preamps and a selection of favorite high-end mics from Dreamhire in NYC. The premier rental facility in New York City, Dreamhire brought the assorted collection of gear right to the studio and then took back the unused gear a day later. We ended up renting a Neve 1073 preamp and ran the lead vocals through a Urei 1176 Blackface compressor at a cost that was only a few hundred dollars for the week — a much better option than trying to buy (and then maintain) thousands of dollars worth of vintage studio gear.
The condenser mic that won the shootout? While it would be convenient to assume a classic Neumann U87 or K67 (and it almost ended up being a Neumann), the Shure KSM-44 proved to be the crowd-pleasing favorite. After borrowing Ron Nevison’s KSM-44 for the duration of the recording, I ended up purchasing one for my studio. It wound up being used on lead vocals, backing vocals, and some of the room miking for guitars. Really, all of us found it to be one of the most fantastic vocal mics you can get for under $1,000, and its use on other instruments was a great bonus.
After we finished tracking most of the lead vocals, we returned to House on the Hill to spend our time recording backing vocals — a lot of them! In some cases, we had specific harmonies worked out as scratch ideas with Ron from during the lead vocal tracking sessions. But for most of the songs, we typically recorded harmonies, mixed down a chorus or section of a song, FTPed it to the server for Ron to download, got his feedback, made changes, and so on. The remote collaboration worked quite well. Note that if your band has its own website, you can FTP files to it pretty easily. You don’t need to spend money on a service like yousendit.com.
We also made use of Apple’s iChat software and iSight webcams to video conference in real-time with Ron, taking advantage of free Internet communication and to keep the face-to-face working vibe going.
We tracked lead vocals for the song “Can’t Go Back” at House on the Hill. Although I didn’t have the classic Neve/Urei setup, the KSM-44 into the ADL 600 sounded fantastic, and after the record was mixed, I doubt anyone can hear a difference in the gear that was used to track vocals on this song.
Eventually, we finished tracking all of the backing vocals, finished up the keyboard recording, recorded some percussion overdubs, finished the guitar solos, etc., and then it was finally time to mix the record.
Mixing
When it came time to mix the album, we considered flying out to Portland or Los Angeles to mix with Ron and one of his engineering colleagues. But once we learned that Earl Cohen would be available to mix the album if we mixed in the NY metro area (he was thrilled to have the opportunity to mix a Ron Nevison production), Ron was happy to return to the East coast if we could find a studio of comparable quality to his West coast options.
When we started the process of researching studios in the NY metropolitan area, little did we realize that northern NJ was home to one of the most impressive pro studios in the country. The Barber Shop, located on scenic Lake Hopatcong and built inside a converted historic church, is a multi-million dollar studio facility featuring the best of, well, just about everything you could ever want in a pro studio: the last production model SSL XL 9000 K-series board manufactured, a dedicated server room housing the Pro Tools rigs, vintage gear galore (like EQs formerly owned by George Martin and used on Beatles recordings, acquired from Abbey Road Studios), stairwells and bathrooms wired for sound (in case your vibe lies outside the studio confines), a comfortable producer’s lounge and restaurant, mic vault… you get the idea.
Unfortunately, our wintertime mix session meant that the sun deck outside the restaurant wasn’t covered with bikini-clad women, but the vibe was still fantastic. Earl felt like a kid in a candy store (he’s the one who turned us onto this fantastic studio in the first place as he loves to work there), Ron got to relax in the control room, lounge, or at his nearby bed & breakfast, and we got to make a fantastic record sound… fantastic!
One of the big decisions before mixing the album was this: analog or digital? We considered mixing in a Digidesign ICON environment, but Ron and Earl felt strongly that the SSL board would really impart that classic analog sound… and they were right! If you’re going to mix your album in the analog domain, you can concern yourself a bit less with whether or not you tracked to tape or disk because after running your music through a purely analog signal chain, it’s going to warm up nicely.
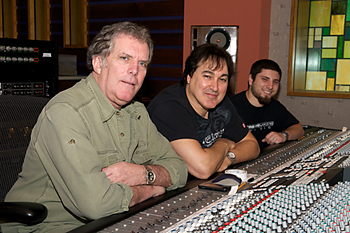
Ron Nevison, Earl Cohen, and Mike Feretti. If only every record could have this team!
There are some caveats to mixing in the analog domain, however, that you should be aware of while tracking your album. If you’re used to working in the Pro Tools environment (or any other DAW), you take for granted the ability to pan signals on a track Left or Right over the course of a song, but on an analog mixing desk, the process isn’t so straightforward. As you adjust the panning, volume levels change. So if you envision a rhythm guitar part being panned to one side and then set up the middle in another, it will save editing time at mixdown if you record those parts to separate tracks.
The other caveat is time, and working against a clock. Mixing in-the-box with Pro Tools, using plug-ins for most of your dynamics processing, you have the beauty of instant recall. Want to go back and tweak a mix? No problem — it’s a matter of seconds to just open the old session file. But working in a room full of analog gear, the teardown and setup time to reconfigure all the outboard gear for a song can literally take one full hour! Fortunately, Barbershop assistant engineer Mike Ferretti knew the gear in the studio inside and out, and his binder of session sheets was maintained meticulously. He had to draw on blank gear template sheets every knob and every switch setting for each piece of outboard gear, and as you’ve seen from the photos, there was a lot of gear and patching to keep track of!
If you’ve got a real time and budget deadline, you might find that mixing in a nice analog room could just take too much time. Of course on the flip side, your engineer may be able to dial in great sounds faster with the classic analog gear than using a mouse to tweak plug-in settings.
The process of mixing the CD was pretty hands-off for the band most of the time. Generally, Ron would give Earl some basic direction or thoughts about a song, and then he’d leave Earl and Mike for a few hours to let them dial things in and get the rough mix in place. Then, Ron would go back in and work with them at the desk, automating parts of the mix from the faders and suggesting changes in the effects treatment, and when they were happy, they would bring a couple of guys from the band in to review the mix, offer comments and critiques, etc. Some refinements would be made and then finally, a mix would be finished.
If you are planning to try getting music placed in film or television, at mixdown time, it is a great idea to print an instrumental mix of each song after the final “real” mix has been printed. Often times, music publishers seek instrumental versions of your songs to use as pads within the program material. Why have to re-visit the studio later if you can just take an extra five minutes per song?
Mastering
The black art of mastering. Kids, don’t try this at home. Yes, you can buy software tools to help you do this, but really, if you want your product to compete with records from “the big guys,” it’s best to leave mastering to dedicated mastering engineers, and that doesn’t mean asking your mix engineer to master for you.
Mastering is, of course, the final stage in preparation for duplication. This is where levels, equalization, and compression are “optimized” so that your CD sounds comparable to other similar recordings. Optimized is a loaded word when talking about mastering, as a record executive may interpret this to mean “I want my band’s CD to sound louder than other similar rock CDs” while an artist may have a very different idea about what they want to get from the mastering.
If you want expressive dynamics to be preserved from your mix, forget about trying to win the “volume wars” that you hear about and just focus on making the sonic fidelity its best. Generally, when it comes to volume and EQ, you really just want your release to sit well in a mix with other similar titles. Put your CD in a disc changer. When shuffle play randomly goes to your CD, you don’t want the listener to have to adjust volume or, even worse, bass and treble EQ on their stereo.
Mastering is also the time when you finalize track sequencing (song order), cross-fades, and inter-track spacing between songs. You might want one song to immediately kick into the next track, or have a dramatic pause at the end of one song and before the next one starts.
The mastering lab (notice they don’t even call it a studio) is configured differently from the rooms you track and mix in. Sure, you’ll see a mixer and computer, but you’ll typically find a variety of different tools in use, both on the hardware side as well as the software, and the listening environment will be optimized for the critical listening required at this phase… and you can bet the studio monitors are even more expensive than the ones used to mix your record!
 We mastered our CD at The Cutting Room in New York City with Tony Gillis. A mastering engineer like Tony has more credits than we could list here across a wide range of music styles. A mastering session typically last only a day or two (compared with days or weeks to mix a record), and one reason we worked with Tony was that he has mastered a lot of material for Earl Cohen, and Earl loves what Tony does to his mixes. It’s very much a partnership of the ears. Both Earl and Ron spoke with Tony via telephone to talk about the mix and what they were looking for from the mastering. Days Before Tomorrow vocalist Eric Klein and I attended the mastering session to make sure that our “baby” came out sounding even better than when it came in.
Some artists like to bring a selection of CDs with them to the mastering session, and some mastering engineers welcome this... but not all (so don’t force the issue). Bring three or four CDs that your product should sound sonically comparable to if they were placed on shuffle play in your CD changer. This is one easy way to make sure your final product sounds right. But then again, a mastering engineer who has mastered thousands of records probably knows how your music should sound coming out of his/her room.
Whether or not you bring reference material to the mastering session, it’s best to be able to take your mastered recording home for a few days, have everyone in the band (and your producer and engineer) critically listen to it in various environments —cars, computer speakers, home theaters, etc., and then report their findings so the mastering engineer can make final tweaks before then producing masters for you.
You should receive a few CDs from the mastering lab: one master that you shouldn’t touch (send it un-played to the duplication plant), and a copy or two made at the lab from the master. Use these copies for reviewing the material, burning copies for friends, etc., but don’t ever play the original disc (you already know the first disc is good because that’s the one the mastering lab made copies from). Send the master CD, along with one of the lab duplicates, to your CD manufacturing plant, and clearly identify which one is the “master” master and which one is the duplicate.
Manufacturing
The final stage in the process is getting your CDs manufactured. If you’re signed to a label, you may have nothing to do with this, but independent artists handle everything. We could write a separate article on getting CDs professionally manufactured, but we’ll just leave you with some random (but important) things to consider when choosing a company to manufacture your CDs:
- Will they assign a unique UPC code to your product, or must you obtain this for yourself? Without this product identification, forget about selling your product at retail (both in brick-and-mortar establishments as well as through online retailers).
- Do they have any distribution partners that may make it easier for you to sell your CDs or downloadable files? You’re not going to get your product sold in Apple’s iTunes Music Store by yourself, so that relationship is going to come from your manufacturer, a distributor whom your manufacturer partners with, or via some other deal you obtain for your release from another distribution company.
- Do they provide single speed glass master manufacturing? Your master gets transferred to a glass master for duplication via CD drives that transfer data at speeds from 4x to 8x and above. Audiophiles and engineers may debate with you that a 1x transfer yields higher quality audio results. If your CD is a recording where supreme sound quality matters and you’ve spent extra to get the best of everything throughout the recording and mixing process, there’s no reason not to go the extra mile at the end of the race.
If you’re curious about other details from our recording experience making The Sky Is Falling, feel free to post questions in our forums or reach out to the band directly via our MySpace page or website.
Shameless self-promotion here: if you want to hear what a great job these guys did on our record, and you're a fan of melodic prog rock, you can purchase the CD worldwide from CDbaby.com. (You can download it from iTunes, but the CD sounds better.)