If you’ve got a project studio and are simply running your mixing desk or computer DAW straight into your studio monitors without any special calibration of the output, and unless you’re working in a purpose-built studio space with an optimized audio environment, you’re doing your ears a disservice. You can al improve the sound of your monitors (and ultimately, your mixes) without having to invest in a new set of speakers when you apply a little bit of room correction to the audio signal.
| Category | Value | Rating |
| Features | 20% | |
| Usability | 25% | |
| Sound | 25% | |
| Documentation & Support | 10% | |
| Price | 20% | |
| OVERALL RATING = 3.2 3.6 stars or better: Outstanding, WIHO Award 3 stars or better: Worth considering 2 stars or better: Suited to specific needs 1 star or less: Not recommended |
||
There are both hardware and software-based solutions for optimizing the output from your studio monitors, and the KRK Ergo system is a compact hardware solution that optimizes the audio signal to correct for deficiencies in the listening environment. In addition to room analysis and correction, it also provides the ability to switch between two different sets of speakers, or selectively add/remove the output to a subwoofer.
In use, the KRK Ergo system is easy to set up, makes calibrating your speakers easy, and most importantly, improves the accuracy of the sound you hear from your speakers. If you are looking for an affordable solution to improve the sound from your monitors and also provide easy A/B switching, Ergo belongs on your short list of products to consider.
Features
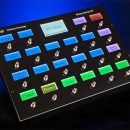
The KRK Ergo is a compact box designed to sit front and center on your mix desk for stereo and 2.1 mixing (stereo plus subwoofer). The rear of the unit accepts audio input over a pair of ¼” TRS jacks or via digital S/PDIF, and two sets of ¼” outputs are provided. Set A goes to your primary monitors and set B goes to either a secondary set of speakers or a subwoofer. There’s also an input jack for a test/measurement microphone, a pair of Firewire 400 ports for computer connectivity, and connectivity for power and headphones.
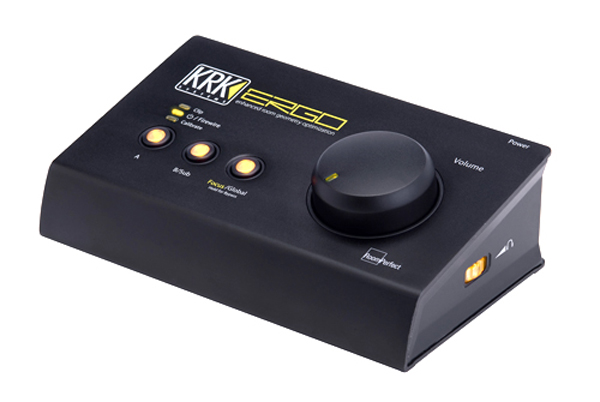
 The front panel is pretty straightforward. Besides the oversized master volume knob, buttons let you toggle between outputs A and B (or both if the latter is for your subwoofer). A Focus/Global/Bypass button changes the output from corrected (Focus) to Global, which provides a wider listening sweet spot for when you’ve got a group of people crowding around the desk to check out some playback. Holding the button a few seconds enters Bypass mode, in case you want to compare your output with the uncorrected sound from your speakers.
A headphone level control is tucked away on the side of the unit. It is illuminated—a nice detail.
Audio specs are high enough that the Ergo system won’t compromise your output. There is 118 dB of dynamic range, and total harmonic distortion (THD+N) is 0.003%, and sampling of the audio signal occurs at 96 kHz.
KRK includes the test microphone, mic clamp, and a short adapter plug that goes from a microphone XLR cable to ¼” TRS Male for attaching to the Ergo unit.
Usability
Internally, the KRK Ergo system relies upon RoomPerfect technology licensed from Lyngdorf Audio. Their system of room correction utilizes a subtly different method of room analysis than other competing systems, though at the end of the day, they all work (more or less) by sending a variety of test tones through your sound system, measuring the sound via a test microphone, and then analyzing the results and processing them through a software or hardware algorithm.
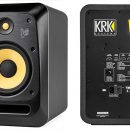
It only took a few minutes to set up the system. First, we connected the S/PDIF output from our PreSonus StudioLive mixing board to the KRK Ergo, followed by our beloved KRK VXT 8 studio monitors on the outputs for Speaker A and a set of Electro-Voice powered loudspeakers on the outputs for Speaker B.
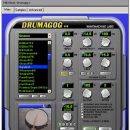
We installed KRK’s Ergo software on our studio’s Apple Mac Pro workstation after downloading the latest version from the company’s website (instead of using the supplied CD).
Configuring the Ergo system required attaching a Firewire cable between the Ergo and the computer, but once we finished calibrating and configuring the system, we were able to remove the cable from our setup.
The Ergo Control Panel utility enabled us to configure the system for use with two sets of speakers or for use with a subwoofer, in which case you can adjust the crossover frequency via a slider that becomes active when the 2.1 speaker mode is selected. We also selected S/PDIF as the input source for our audio.

The Ergo Cal application was used in combination with the included test microphone to calibrate the system, and a calibration button on the rear of the Ergo needed to be pressed to allow the calibration process to begin.
The process for calibrating the system should be familiar to anyone who has used similar systems before. We followed prompts in the application on screen to set the volume level of our speakers, positioned the microphone in various locations around the listening area, and let the system run test tones through the speakers from each location as it capture the results.
Overall, the process was simple, and took approximately ten minutes to complete. We were then able to save the results to the computer for future use if we were calibrating monitors in multiple studio locations.

Upon testing out our sound system, however, the results were surprising, as we didn’t hear anything from our second set of outputs! A call with KRK’s technical support confirmed that we needed to calibrate both sets of speakers before we could do simple A/B speaker switching on the Ergo. So, after we calibrated the second set of speakers, we were fully operational.
The buttons made it easy to select between our sources and compare the audio with our unprocessed sound, and while they had a nice feel, we were a bit disappointed by the feel of the cheap plastic volume knob. The operation was smooth, but we would have liked it to have a more solid feel like a pro studio level control.
Our biggest frustration, however, was enough to discourage us from using the KRK Ergo in our studio: it is critical that you power down your speakers/amps before turning the Ergo unit off, and equally important to power the Ergo up before turning on your speakers, otherwise a frightening boom-meets-thump will pummel your speakers. After doing this more than a few times, we truly feared that we were going to destroy our monitors.
There is a familiar order of operations for PA systems: power amps are the last items turned on and the first items turned off to protect speakers. And in the case of powered speakers, those are the same as the power amp in the old rule of thumb. But working in the desktop studio environment, with the Ergo sitting in front of us on the desk, it was instinctive behavior to flip the closest power switch to us before hitting other power switches for our audio equipment. Obviously, connecting everything to a single, master power conditioner isn’t’ a good idea unless you spend for a unit with staggered start-up times for the various attached devices. We think it’s a real design flaw that the Ergo does not feature a safe power-up that gradually applies current to the speaker outputs when starting up or powering down to avoid this potential equipment hazard. For some of your studio environments, however, this might be a completely moot point.
Sound
The KRK Ergo system makes a difference you can hear, and it’s a good one. All audio through our VXT 8 monitors sounded better. In particular, the low end had more clarity and definition than the unprocessed output. This was not a correction that simple EQ would have taken care of, as it was a carefully sculpted change that managed to clean up the low frequencies in our audio without removing the presence or punch of our low end, and without compromising the mid- or high-end clarity that our KRK monitors are already great at delivering.
Every studio is going to experience a different degree of correction, more subtle or extreme depending on the environment, but for us, in an acoustically treated studio environment, the subtle difference made by the Ergo system was still enough to translate into a more accurate listening experience. Bottom line: Ergo delivers.
Documentation and Product Support
The Ergo’s user manual is outstanding. The high-gloss, color manual covered everything from installation of the hardware and software apps (on Macintosh and Windows) to calibrate your system, and then went further with numerous connection examples for the myriad studio setups you might have.
The manual discusses use of Ergo with various popular DAWs, too, and features a great troubleshooting section as well. More manuals should be this clear and detailed, and you don’t need to be a dedicated audio engineer to understand it.
Price
The KRK Ergo (MSRP $799) sells for $500 street. If you’re working in a poorly engineered recording/mixing space—like your basement, garage, or bedroom, for example… no wait, we mean recording classic albums in abandoned castles, using the Ergo system to calibrate your speakers will make a real difference that helps your mixes translate well from one location to another.
So before you throw good money away investing in better monitors, invest in audio correction first. Even if the Ergo doesn’t make enough of a difference to improve the sound of your mixes and you ultimately do need better speakers, you’ll want to calibrate them with this system anyway.
Contact Information
KRK Systems
www.krksys.com
| Evaluation Short-List |
|