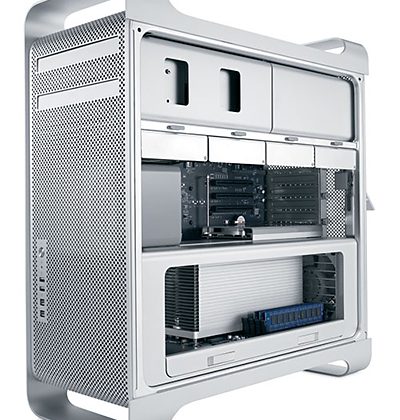
It’s safe to say that a vast number of commercial and pro-level project studios have digital audio workstations built around Apple’s aluminum enclosure Mac Pro computers, mainly dating from 2008 through 2012. These boxes are supremely accommodating to storage, with as many as four easy-access drive bays, four PCIe slots, and two DVD drive bays that can be reconfigured as needed to hold additional storage.
But with Apple’s redesign of the Mac Pro in 2013 to that of a compact, shiny trash can, completely devoid of internal storage drive bays, many pros have been asking: what now? The new Mac Pro starts at $3,000 with minimal onboard, solid-state storage, and you’ll have to spend hundreds of dollars just to buy an external enclosure to hold your hard drives, and another few hundred dollars just to hold any necessary PCIe cards.
What if you could simply supercharge the performance of your existing Mac Pro, giving it newfound performance that feels like a significant leap forward, at a fraction of the cost of upgrading your entire system? We’re happy to say that it’s quite easy, affordable, and the results are impressive. These are the three areas of your system that can be upgraded quite affordable, and the differences in performance will be staggering.
RAM
Starting with the obvious, how much RAM do you have installed on your Mac Pro? By default, the 2009 Mac Pro shipped with only 3GB RAM. If you have 8GB or less installed, it’s a miracle you’re getting any serious audio production work accomplished on the computer (go to the Apple menu and select About This Mac to see how much memory is installed). You can easily upgrade to 16GB, 24GB, or more depending on which generation Mac Pro you’re running, and if you’ve been suffering from a minimal RAM configuration, absolutely every application is going to perform quicker when you install additional memory. Without sufficient RAM, your computer has to constantly swap bits of information that it needs out of the limited RAM and onto one of your hard drives in order to function, and reading data from a hard drive is exponentially slower than retrieval from RAM or cache memory (this is higher-speed memory tied to the CPU itself, and is not user upgradeable).
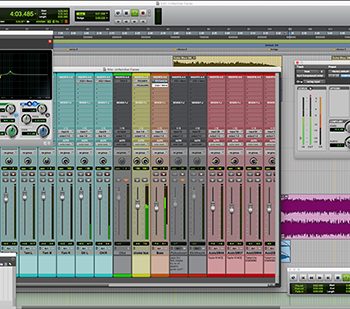
 Many audio applications—like Avid Pro Tools 12, for example—can load entire sessions into RAM if you have enough of it, and that can really help your performance soar.
We bought a 16GB OWC memory upgrade (comprised of two x 8GB DDR3 modules) for one of our Mac Pros from MacSales.com for only $92 this past winter and replaced a few lower-density memory sticks to raise our machine’s total count from 12GB to 24GB. Depending on which specific model Mac Pro you have will determine how many memory slots you have, and whether or not you need to install memory modules in matched pairs or not.
Tip: If you have a few empty memory slots, you can keep your existing RAM and simply add more to your system. But re-arrange the installation so that your higher density RAM is in the first (occupied) RAM slots for best performance. Also, whenever possible, install memory in matched pairs, as this will enable the motherboard to run the RAM in dual- or triple-channel mode, which can squeeze a tiny bit of extra speed out of your system thanks to greater bandwidth between the memory and CPU.
SSD Drives
By now, unless you live under a rock, you’ve undoubtedly heard about SSDs (solid-state drive or solid-state device). You may even own a new laptop with solid-state storage. In short, solid-state memory is a high-speed alternative to traditional hard drives, where data is stored and recalled from within integrated circuits rather than written to and read from physical, spinning disk platters that are accessed via mechanical arms and read/write heads.
 Solid-state drives (SSD) have faster write speeds than traditional hard drives, but their data read speeds are exponentially faster—they read data more than ten times faster than the fastest hard drives available. You’ll feel a significant performance gain by replacing your system’s boot drive with an SSD device. Start-up, launching apps, loading audio samples… all of these tasks will fly exponentially faster than before, and with just a little bit of careful work, the Mac operating system makes it easy to clone drives and transfer all of your content from the boot drive to your new SSD without any need to reconfigure or reinstall your software.
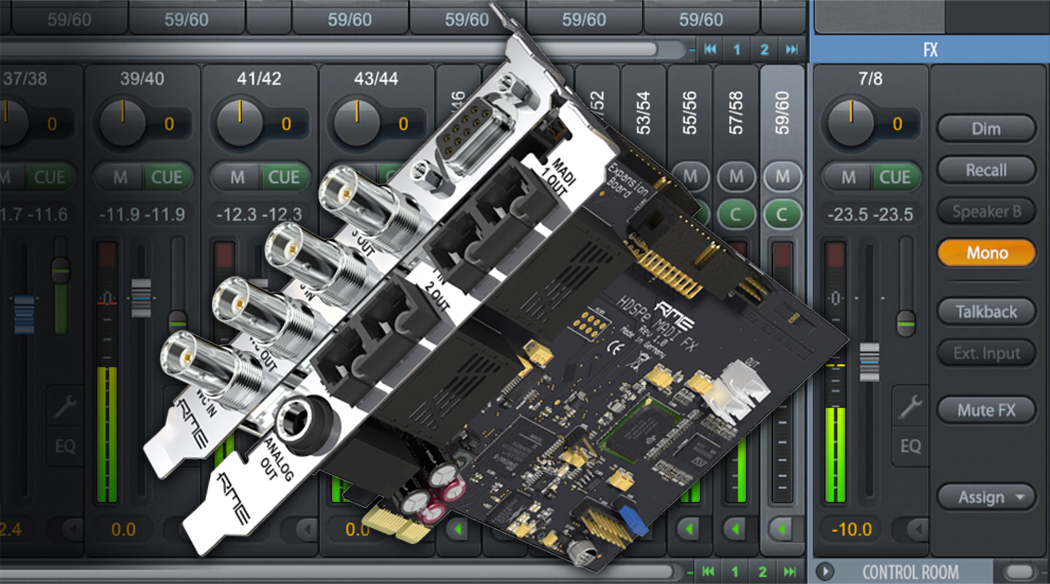
Solid-state storage is available for your Mac Pro both as individual SSD drives as well as configured as solid-state storage mounted directly to a PCI Express card. On your aging Mac Pro, you can squeeze maximum performance from your system by installing an SSD like OWC’s Mercury Accelsior E2 PCI Express Solid State Drive for your boot volume. By attaching solid-state storage directly to the PCIe bus, you get the maximum throughput possible from your machine (6Gb/s throughput from an SSD on a PCIe card vs. 3Gb/s with a drive connected to the SATA bus).
Details: When you use traditional SSD drives, they attach to the SATA bus, just like hard disks. While the latest SATA 3.0 spec maxes out at around 500MB/sec sustained read/write performance (which is awesome), your older Mac Pro has SATA 2.0, which maxes out at just under 300MB/sec. The Gen 1 and Gen 2 Mac Pro’s PCIe 2.0 bus will provide up to 400MB/sec throughput. (New computers with PCIe 3.0 can achieve throughput close to 1,000MB/sec.)

We purchased a pair of OWC’s Mercury Accelsior E2 PCI Express 480GB models for only $388 each on sale, and it only took us a few hours with Apple’s Disk Utility to transfer/clone the contents from our old boot hard drives onto the SSDs (we upgraded both a 2008 and 2009 Mac Pro). Wow! On our early 2009 Mac Pro (Nehalem), which used to take 45 seconds to boot to the login screen, now loads in just under 27 seconds. Launching applications like Pro Tools is a thing of joy, as even on a system loaded up with a healthy collection of plug-ins (Waves Silver, Rob Papen Explorer, Eventide stuff, etc.), launch time is less than fifteen seconds. And our daily work apps like Microsoft Office 2016 launch in a matter of seconds.
We’ve replaced most of the traditional hard drives in our Mac Pro systems with standard SSD drives, which we now use regularly for all of our audio tasks like tracking and mixing. You’ll find numerous manufacturers offering SSD drives in varying capacities. Our top picks for SSDs come from OWC, Crucial, and SanDisk. Stay away from the used market, as first-generation SSDs relied upon technology that is significantly inferior to the current offerings from any of the companies we recommend. The performance difference is staggering, as our SSD-equipped Mac Pros running Avid Pro Tools 12 respond like HD systems. We can’t remember the last time Pro Tools threw us an error message about not having enough resources to keep up performance-wise.
 You know that horrible pause your computer makes every time a hard drive has to spin up from sleep? Kiss that delay goodbye once you’ve made the move to solid-state. SSDs are ready for action all of the time because there’s no physical mechanism to spin up!
Tip: SSDs come in a 2.5” form factor, but your Mac Pro has 3.5” drive bays. For $15, you’ll want to order a NewerTech AdaptaDrive 2.5” to 3.5” Drive Converter Bracket from OWC (pictured here), which will enable you to connect your new SSD drives to the drive sleds that are already present in your Mac Pro. You need one of these for each SSD drive you add to your system.
USB 3.0 Interface
The next great upgrade to your Mac Pro is to upgrade it from USB 2.0 to USB 3.0. That older USB interface limits data transfer rates to, at best, 30MB/sec. But USB 3.0 has sustained transfer rates of up to 625MB/sec. Make no mistake—connecting newer peripherals to your Mac Pro via USB 3.0 will give you a tenfold improvement in performance. If you have artists bringing you session files on USB drives, make them bring them on USB 3.0 drives and you’ll load those files onto your system ten times faster… or mix records directly off their drive without performance issues. Another benefit of USB 3.0: You’ll be able to take advantage of newer USB 3.0 audio interfaces with their improved latency and higher input counts.
We purchased a Sonnet Technologies Allegro USB 3.0 4-Port PCIe 2.0 card from MacSales.com, and this $60 accessory has made a world of difference! It also supplies power to your portable devices for USB charging.
What You Don’t Need
There’s no need to upgrade your video card if you’re in the business of audio production. Apple’s default options that shipped with Mac Pro towers are just fine for driving up to two displays.
The Next Computer…
So these upgrades will easily buy you another year or two of happy service from your Mac Pro. But what if you’re looking to add a new system to your studio today? If it’s a new Mac Pro, they include onboard solid-state storage. Just like many modern laptops, these SSDs look like giant memory sticks, and they can be upgraded with minimal technical skills.
MacSales.com sells fantastic upgrade kits like the OWC Aura SSD Upgrade Kit for Mac Pro. If you purchase a new Mac Pro with less than 1TB of onboard storage, this $895 upgrade replaces the onboard storage with 1TB (up to 4TB available), and also includes Envoy Pro, a nice aluminum case in which you mount the old SSD, which you can then (optionally) reformat and use for any data purposes via the included USB 3 cable! We purchased a similar OWC upgrade kit for our 2013 Apple MacBook Pro and have been thrilled with the results, as the original 480GB SSD now works beautifully attached to one of our music keyboard workstations, and the laptop’s expanded 1TB of storage holds a collection of soft synths, samples, and more.